Email: jweaston99@gmail.com
Phone: 361-484-1245
Address: 2911 Rio Grand St, Austin TX, 78705
I am a graduate Aerospace Engineer from the University of Texas at Austin. I currently live in Austin, Tx where I was born; however, I spent most of my childhood in Victoria, Tx.
I enjoy biking, playing tennis, practicing guitar, playing video games, and messing with technology. I have a great
appreciation for technology as it makes our lives much easier. Throughout the years I have worked on a multitude of projects many
of which you might be interested in as an employer or just because you think they're cool.
Here is a link to my resume
Now you might be thinking that this website is hosted on some soulless server farm with hundreds of servers crammed together in a tiny area but you would be wrong. This server is hosted right here in Austin, Tx in my bedroom.... under my desk. It's being run on a Linux machine that was built by me out of a bunch of old PC parts that I naturally source. No prebuilts here, no sir.
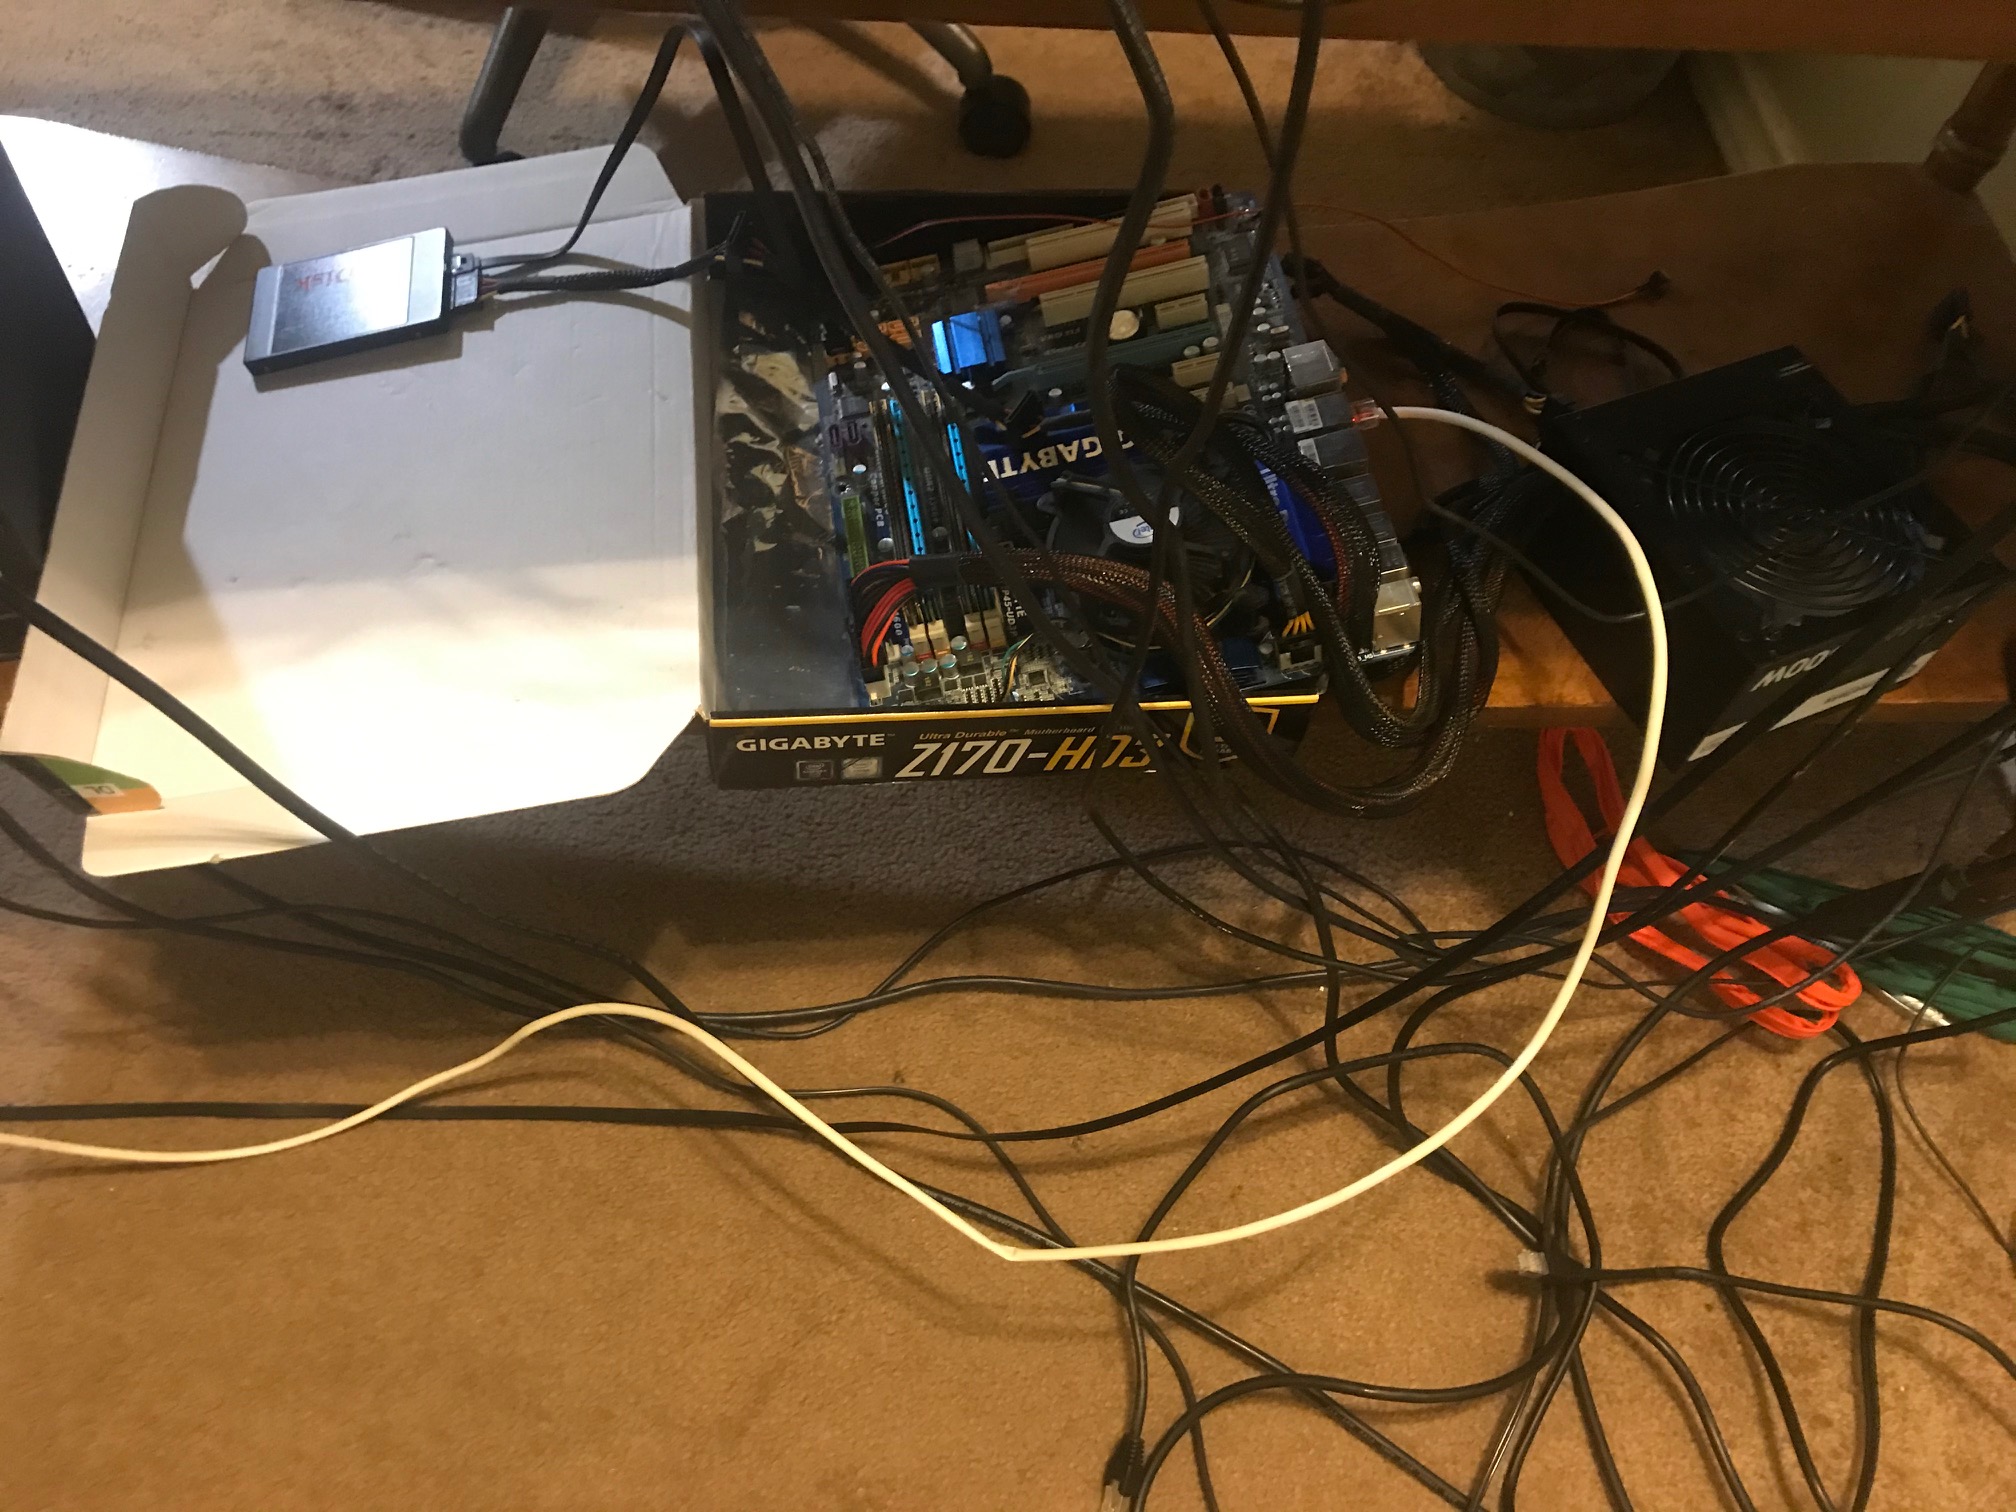
This project started out as a way to host a Minecraft server off my main PC and to be able to run it 24/7. I dug up a bunch of PC parts from old builds and from my Dad. After some work, I got it to run Linux. I wanted it to without a monitor, so I learned how to connect to it remotely with SSH and how to navigate a Linux terminal. I learned how to set up WOL(wake-on-LAN), how to port-forward all the different services to my server and much more. Eventually, I decide "hey I'll try making a website" so I download apache to my server and started learning HTML/CSS/PHP as well. Thats right, this whole website was hand coded by me and thats why this website looks like its from the early 90s (Maybe some day I'll cave and use a professional website builder but I feel like this gives it character...sort of like my personality.) I also wanted to make sure I didn't lose a whole bunch of progress to an unlucky poweroutage so I created github repository and learned the basics of version control. What you see now is the culmination of that work and it is still an on going project that I try to update when I have free time. Recently I've been using it to host a game I've been working on for my video game design class.
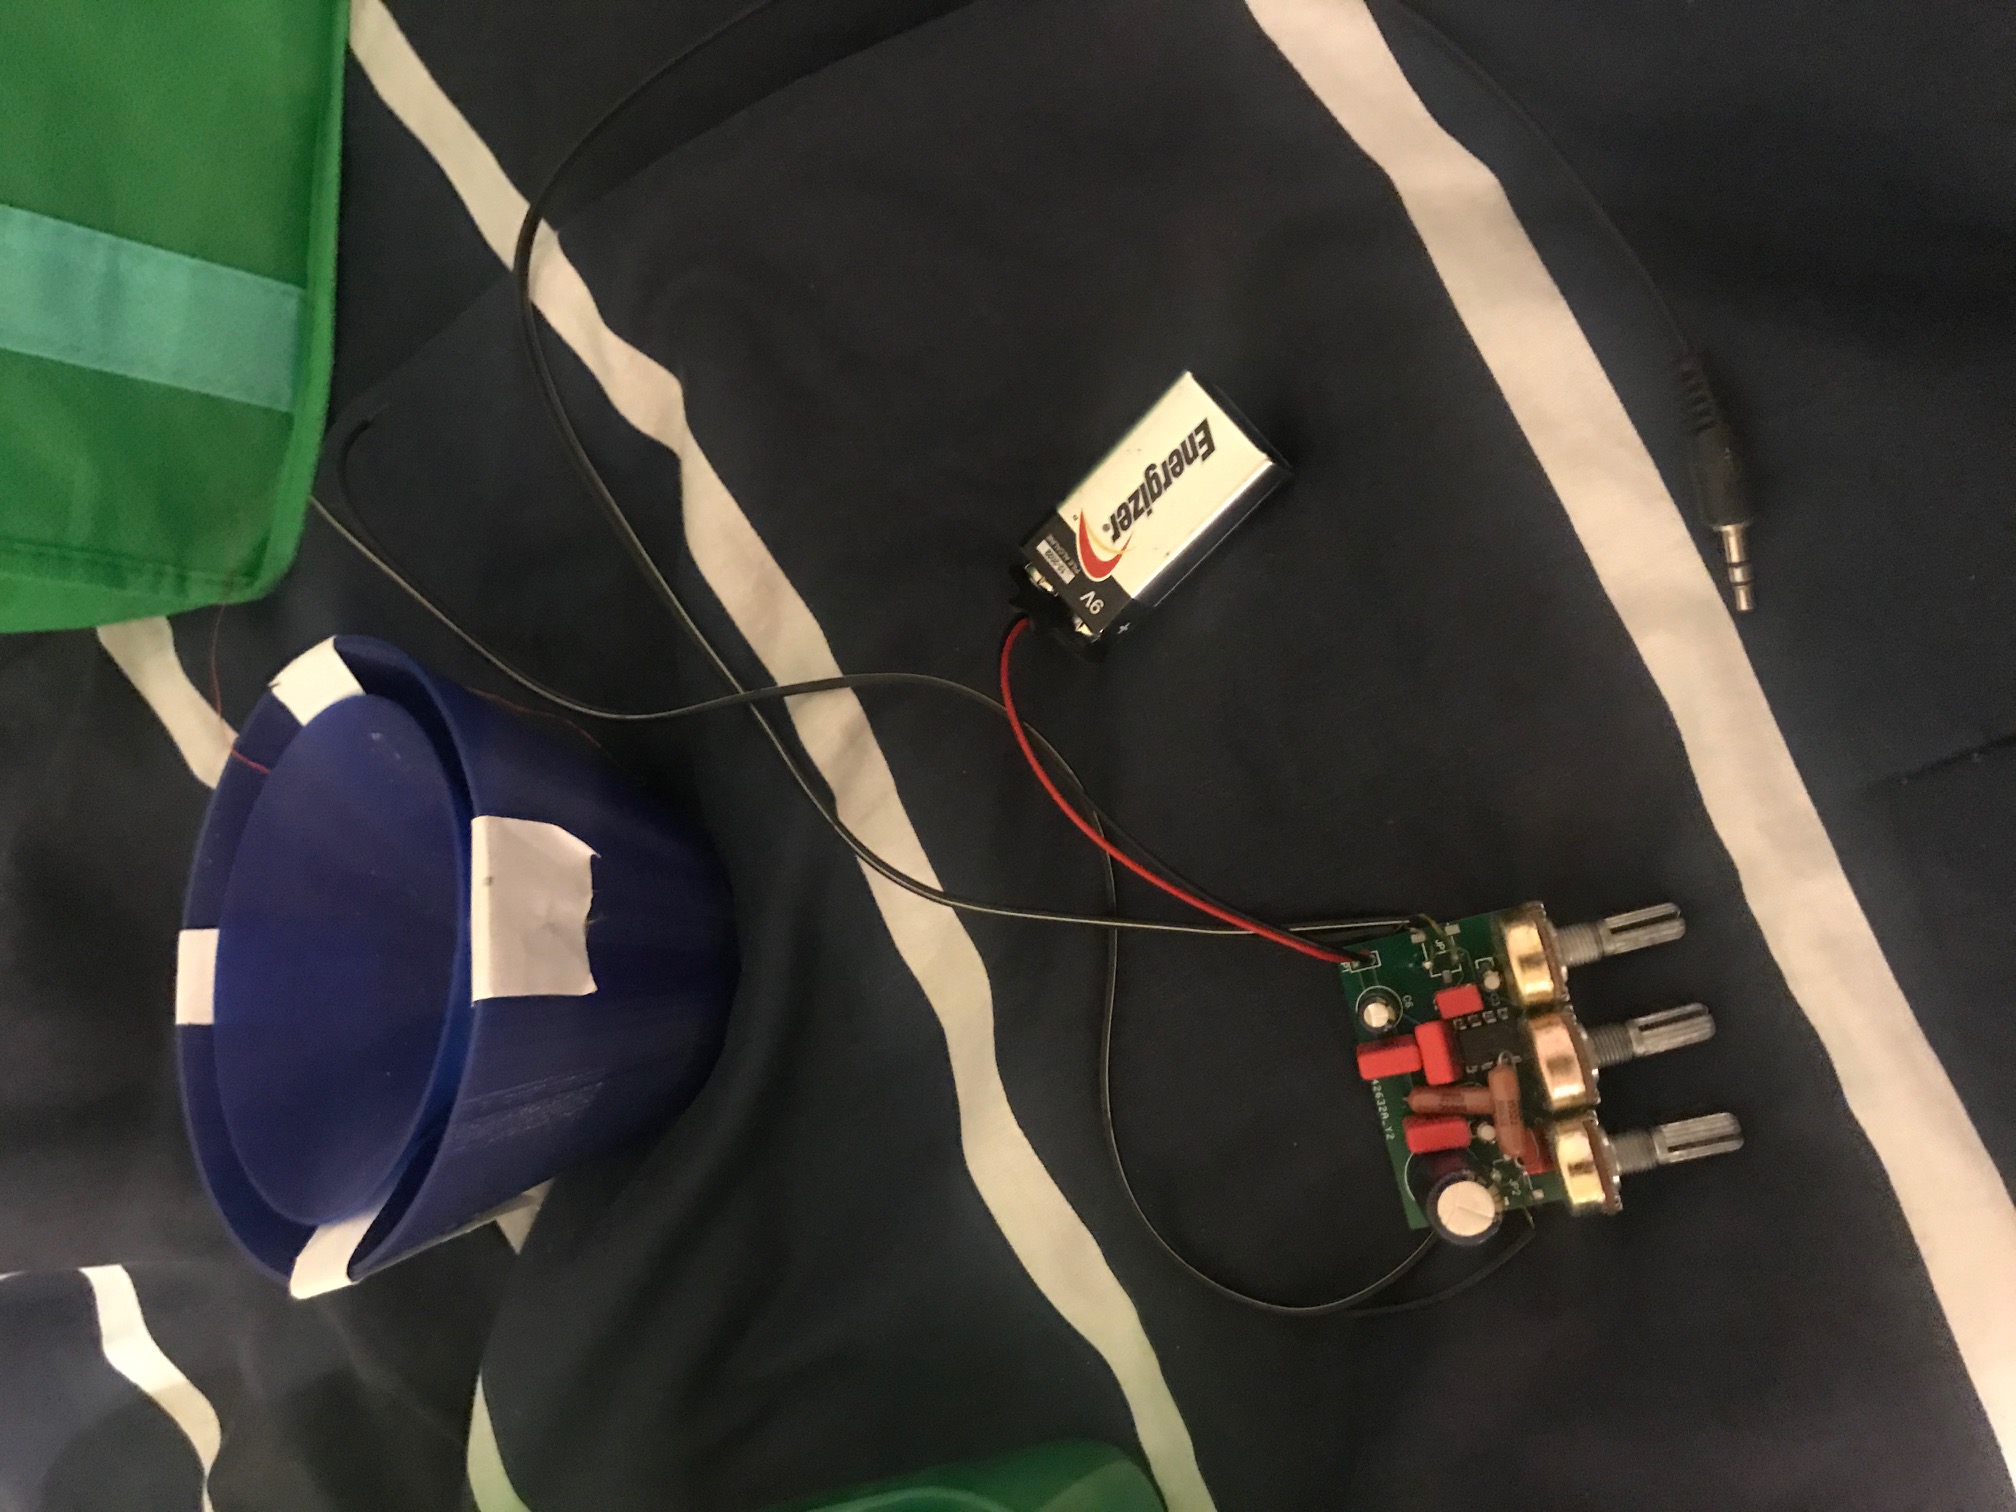
Back in highschool one of our projects was to create a paper speaker using a copper wire, a magnate, a cup, and well... paper. After plugging an oscillator into the two ends of the wire it made a sound. Neat right! Well, I thought we could do better so I found an old aux cord, cut and stripped it, and soldered it to the copper wire. I then decided to 3D print the cone and base as well since our school had just gotten a 3D printer. Once I had implemented the improvements you could plug your phone into it and actually hear music! Very quiet though. But this still wasn't good enough for me. I decided to build an amplifier for it using a breadboard, some loose wires, some resistors, capacitors, potentiometers, and a circuit blueprint I found online. (Here's the link if you're interested in making your own) After putting that together and hooking it up to the speaker you could hear it without having to put your head right next to it.
After I did this I kept telling myself I could make a PCB for the amp and actually solder it together. Well that day finally came and I went online and figured out how to get a custom PCB board made. I decided to order one from a manufacturer rather than try to etch my own as that seemed very difficult and would be way to hard for what I was trying to do. I use the same template from the previous site and ordered it. After it finally came in, I put it all together and now it works great!Or it did till I broke it :(
As mentioned previously, in my senior year of high school our school got a 3D printer for the engineering classes. I was put in charge of it by my teacher because I guess she trusted me and I actually knew how to use it. Later in the year towards the end of the semester my teacher suggested I look into the program called e-nable. This was an online community of people who 3D print prosthetics for children due to that fact that it's cheaper and easier to maintain for children.(You can read about it more here) I decide to go ahead and try it. My teacher reached out to our local community and found an 8 year-old girl who had lost her hand at birth. We communicated with the family and asked if she would like us to make a prosthetic for her. She said yes. So, I met with her and her mom to take the measurements of her arm. I then modified the template of the CAD file and sent it to print. After a couple days of work I got it printed and put together.
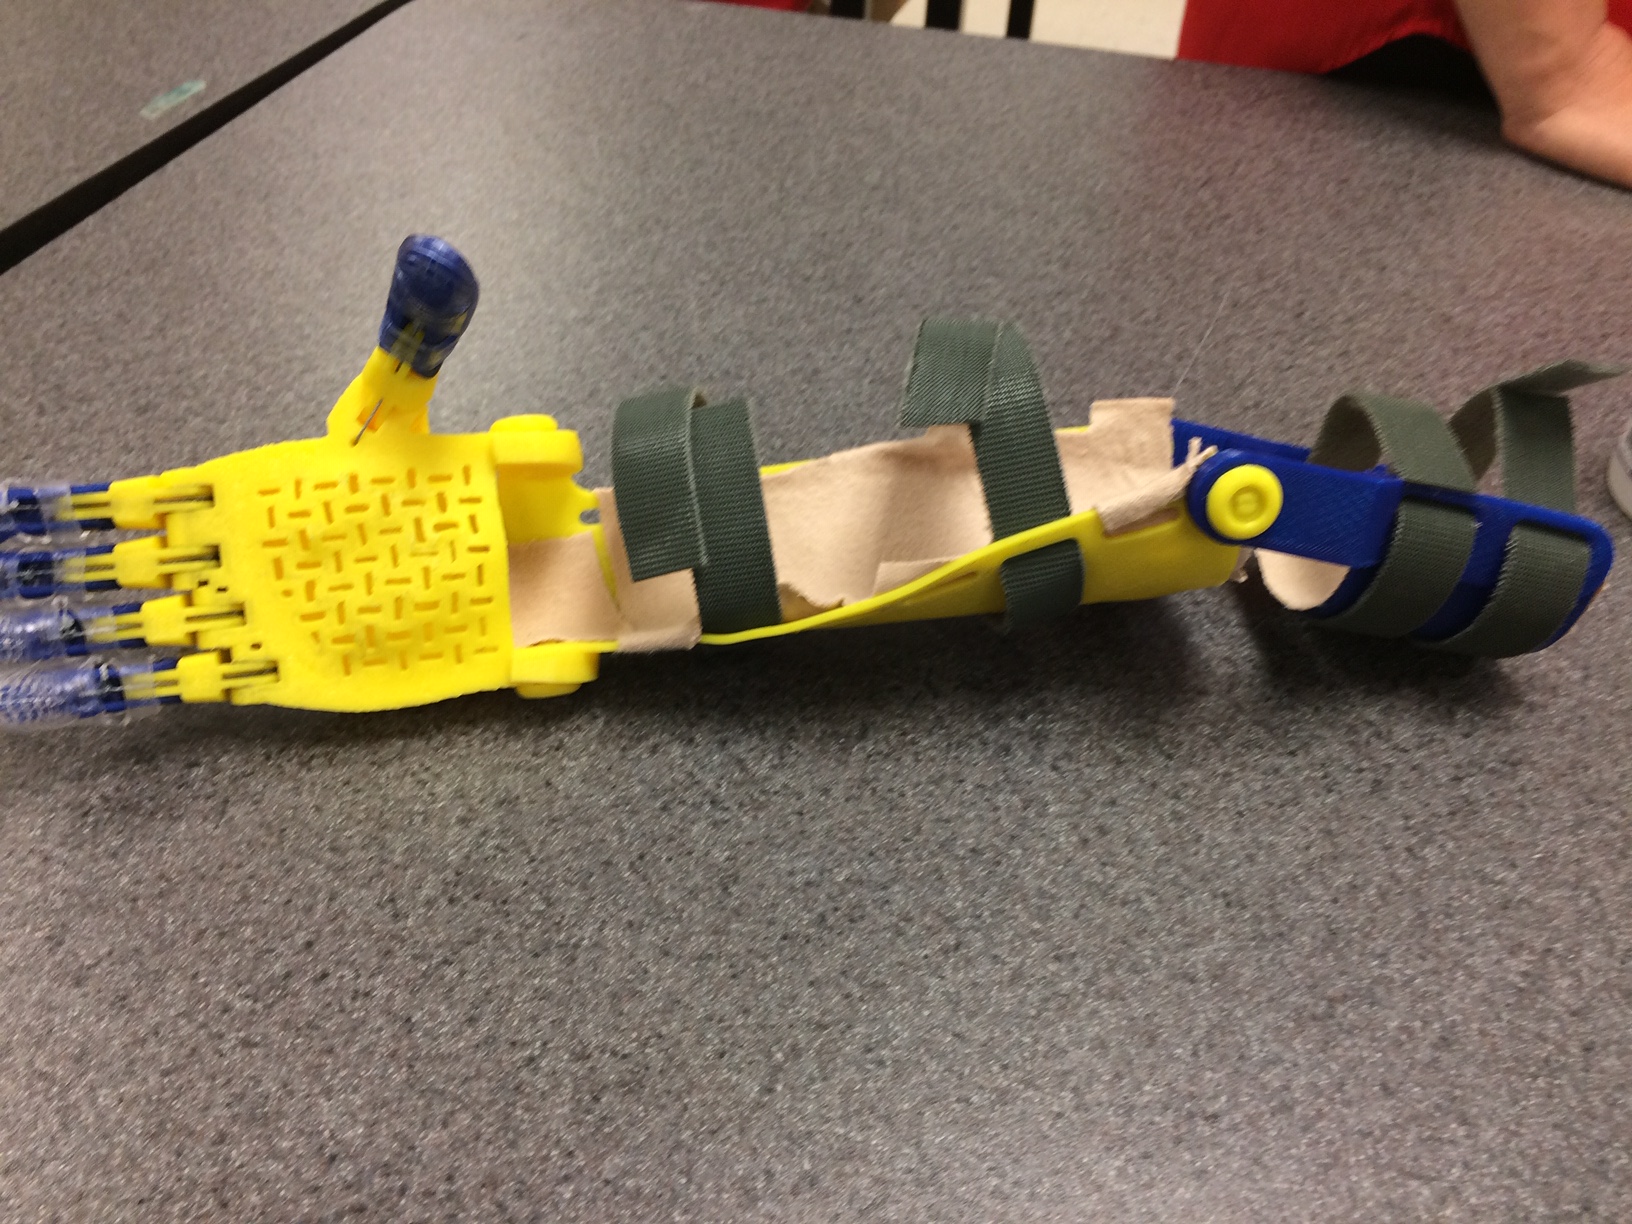
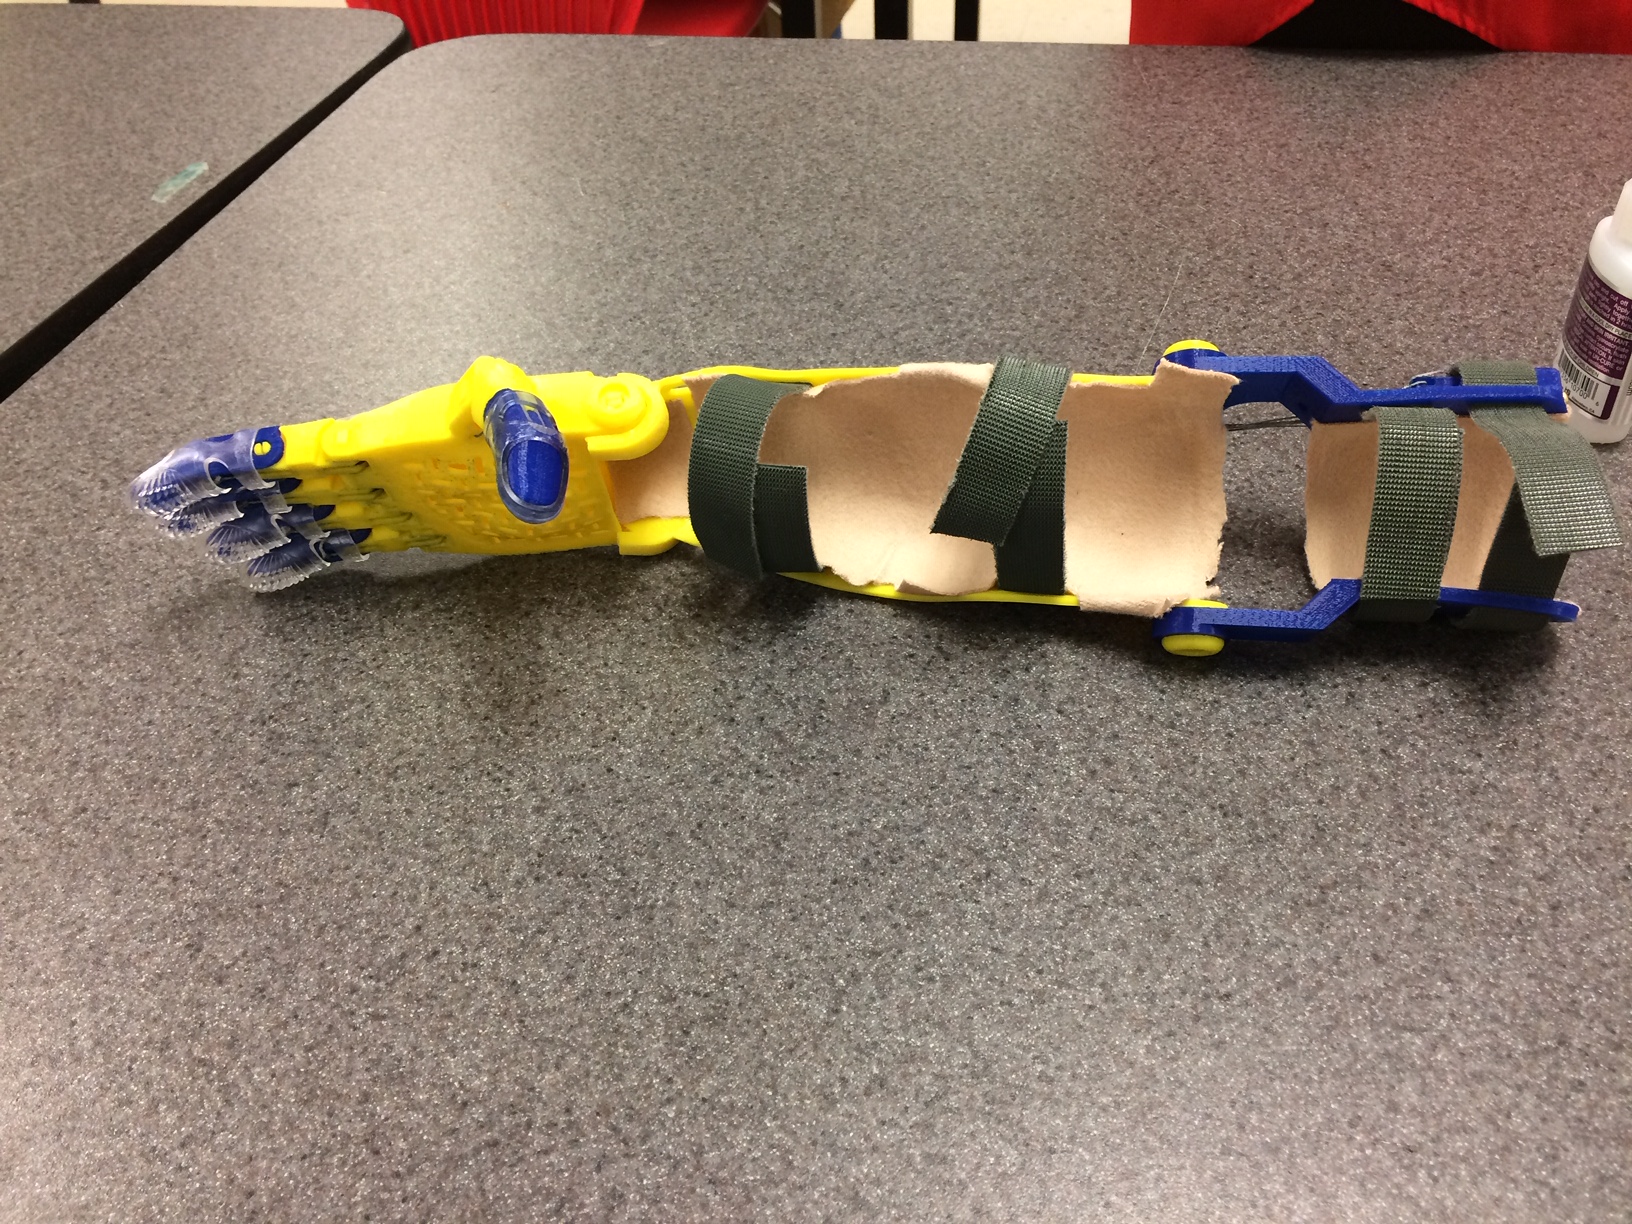
The best part was when I got to see the little girl’s face when I put it on her and it worked!
The local newspaper also got my name put in the newspaper which was pretty cool.
My first year of college I took an engineering design class where we learned to use and a CAD program called SOLIDWORKDS. The
final group project in this class was we had to choose some simple machine or mechanism and model each part in SOLIDWORKDS and
then 3D print out each of these parts. Our group chose to do a wind up car motor. After disassembling the car motor we drew out
each of the parts on engineering paper.
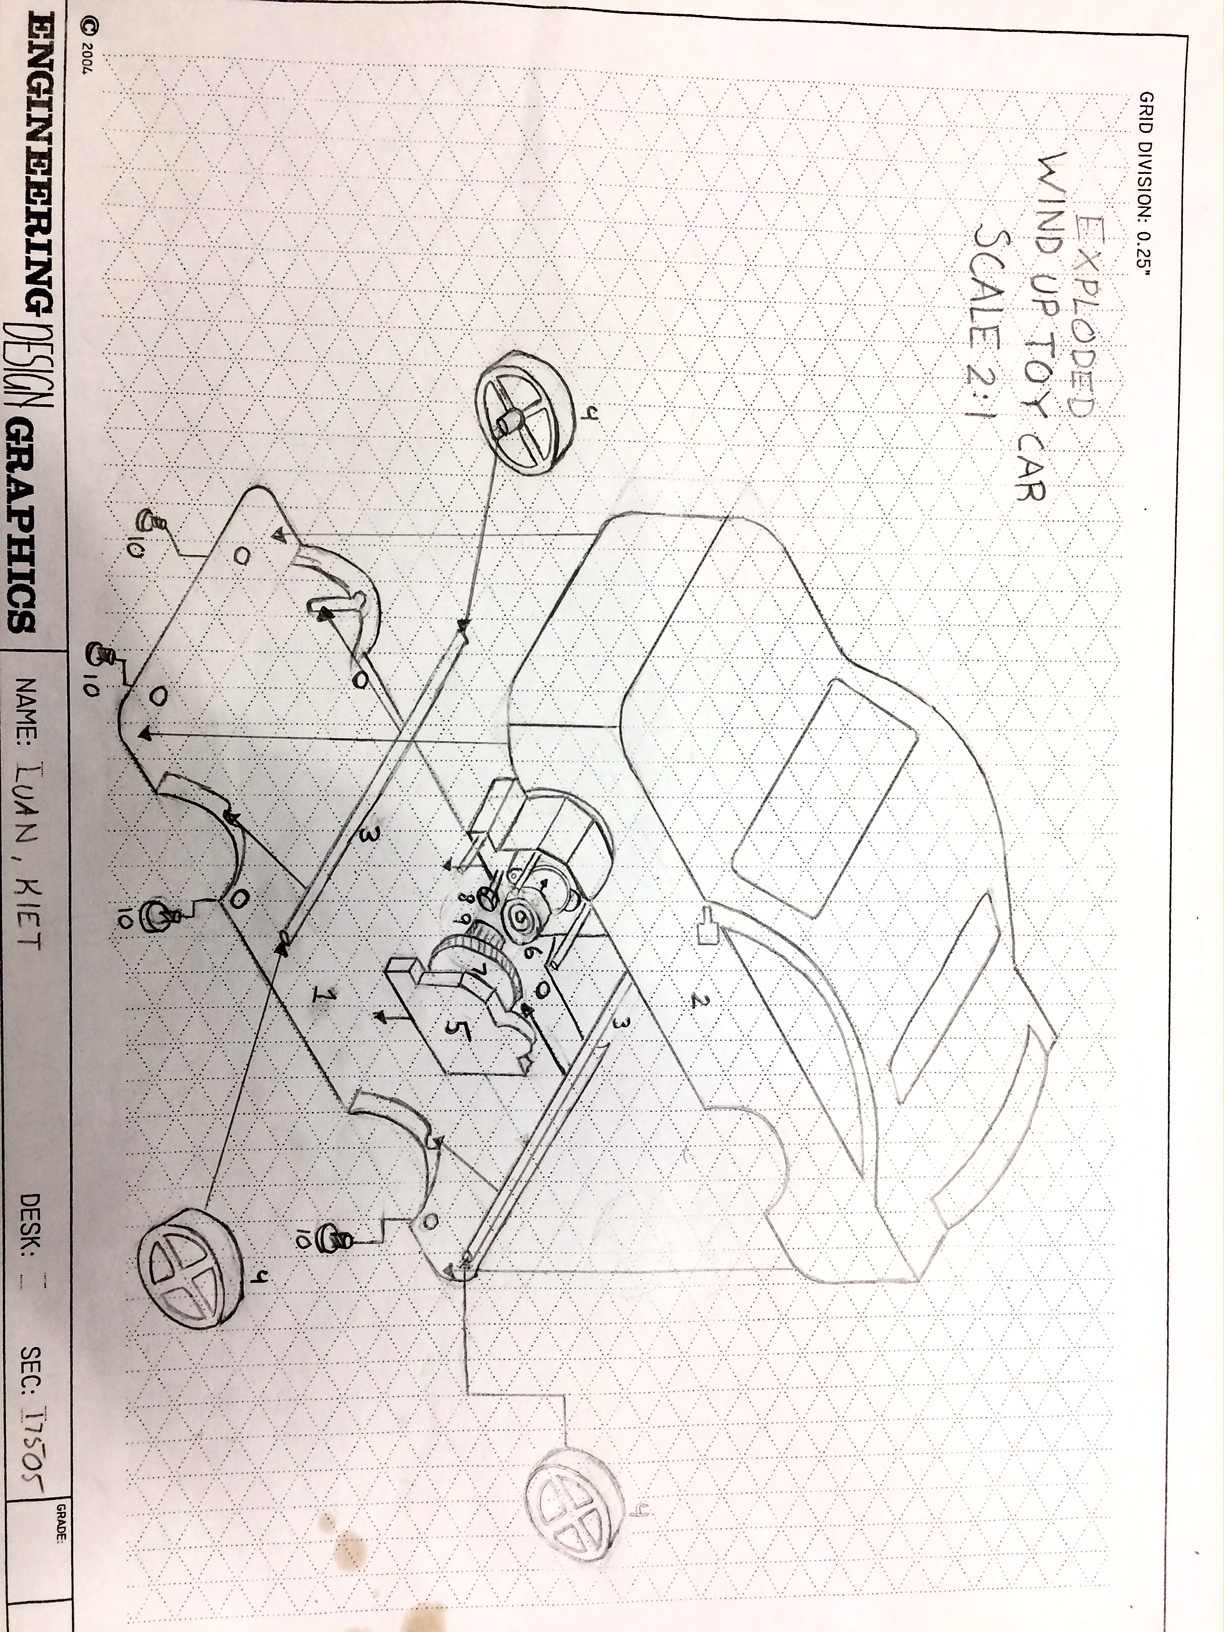
We then took these drawings and modeled each part in SOLIDWORKDS and then put them together in a single model
Here is the final exploded View
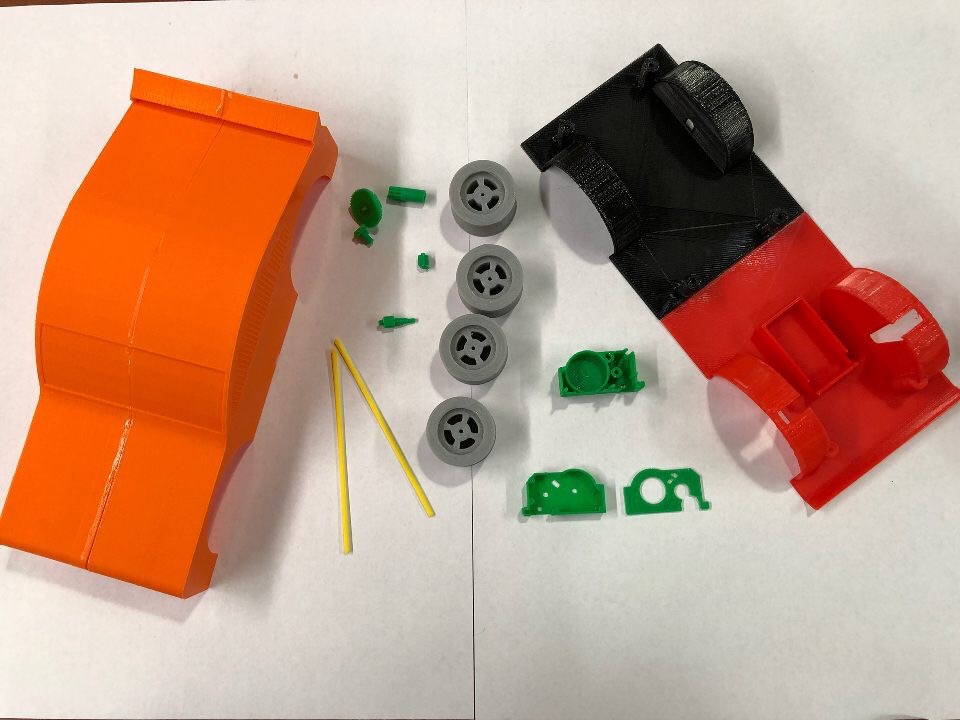
Finally after we had each of the parts we printed them out
As an aerospace engineer I am required to take a low-speed aerodynamics class. That class involves a lab using a wind tunnel. In
this lab our final report involved an experiment of our own design. We chose to analyze how the spin of baseball affects its
flight. To do this we had to design and build an apparatus to test the baseball in the wind tunnel. This consisted of two 2x4s,
a metal dowel rod, two bearings, and a power drill.
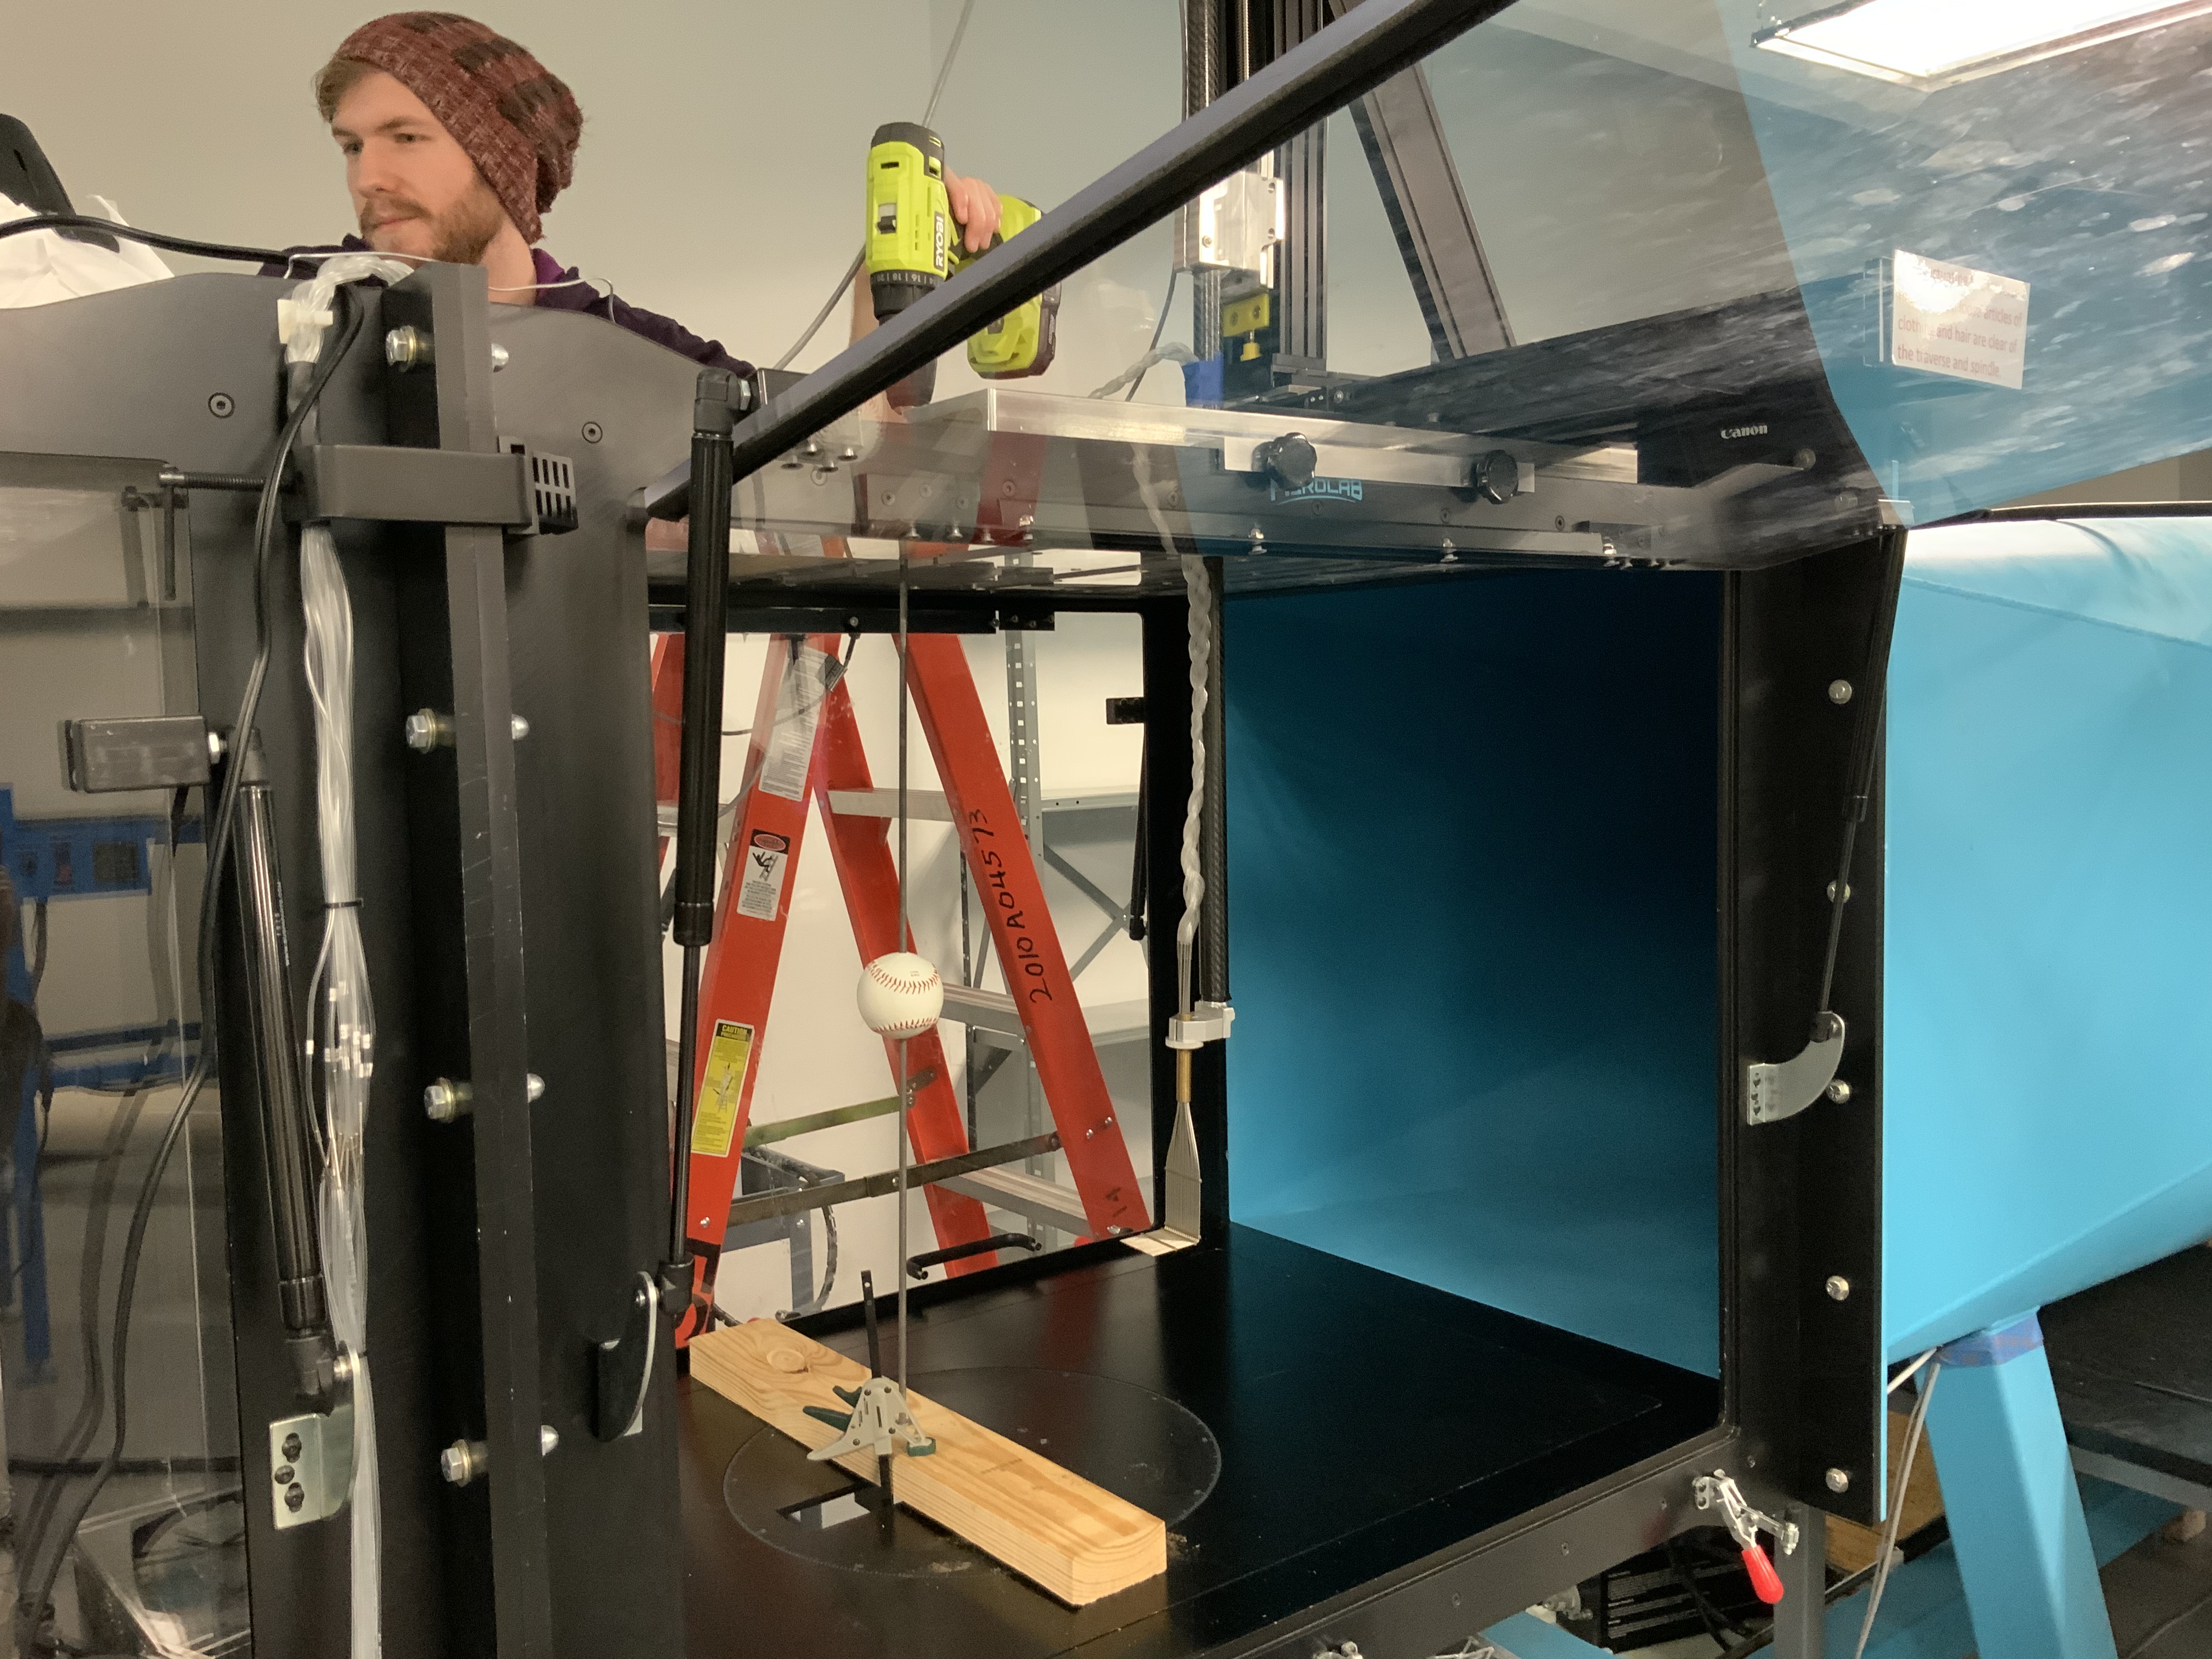
While crude, the device performed quite well and got us the data we needed. Speaking of data this project required a lot of data
manipulation. We had to gather wake profile data for 3 different spin speeds, 2 different orientations and 4 different wind
speeds. Each test collected data for 10 second every 1/100 of a second. I was in charge of manipulating all this data into a
readable and presentable format. Luckly I've had a lot of experience with this as I actually did MS Excel competitivley in
highschool (I didn't think this was a thing
either but it is. I actually made it to regionals a couple of times)
Under construction
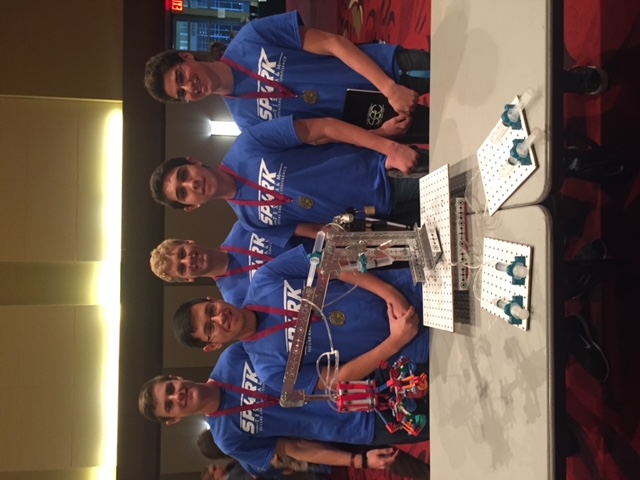
During one of my senior year engineering classes we signed up for a competition at the University of Texas A&M to design, build,
and operate a hydraulic based crane in a series of challenges from stacking wooden blocks to lifting a weight soda can over a
wall, to placing ping pong balls on a pedestal. For this project, our class divided into teams. The team I was a part of was
made the team lead. The first thing I did was come up with a timetable for our group. We knew when the completion was so I
wanted to make sure we had time to design-build and practice with our crane. I had our team start by doing research on various
cranes that were already in use around the world. After a day or two of research, I had our team brainstorm what we thought the
best design for our crane would be given the challenges present to us. We went for a very typical design with a swivel base, a
pivoting arm that allowed for extension, and a free-hanging claw grabber. I then furth sub divided the team into design groups
for each of the parts of the crane. One team for the grabber, one for the pivot base, and one for the arm. We had to decide on a
material to build the crane out of and because of my previous experience working with Tetrix I thought they would be a great
modular building material with which to construct our crane. Though this would not cover the entirety of our material needs. The
claw itself would need to be made out of a smaller more delicate material. For this, we decided to use K'NEX. These small
modular plastic pieces would be great for building a claw. There was one issue that was plaguing each of the team though and
that was how we would attach the hydraulics system. We were going to use medical tubing and various sizes of syringes. Since we
had recently received a 3D printer for our class I got to work on design mounts for the syringes to be attached to the crane at
various points and to various materials. After about a month of tinkering redesigning and building we finally had a build that
we were happy with we decided to start testing it out on the tasks. With a little bit of practice on the operator's side, the
crane worked flawlessly.
Once we had gotten used to the control we were ready for the competition. Finally, the day came where we packed up the crane and
drove to College Station. Once we arrived we took our crane very carefully to the staging room and dropped it off. We got a
look at our competition and were a little scared. Some people had put a lot of effort into building their cranes and had even
had time to decorate them. Then the time had come to compete. We picked up our crane and carried it to the arena area and
started working on the tasks. We felt confident about our abilities and the crane performed perfectly and we ended up winning
first place.
During my high school robotics course, we were tasked with designing and building a robot that could go into a room, detect and
find hazardous waste, collect the waste and store it in individual containers, and leave the area. To test this on a smaller
scale we built a small wooden enclosure to act as the room and use infrared emitting plastic spheres to act as the hazardous
waste. We designed the robot to have a rotary storage system on the back of it to storage each sphere individually on the robot.
We had a claw with an IR sensor to detect the spheres and point at them as well as to detect the relative distance. We built the
robot using Tetrix aluminum channels for the chassis along with Tetrix DC motors and servos. We use a pie pan along with a
hand-made six-slotted fan to make the storage system. Artist rendering below (sorry I don't have any pictures but this was a
long time ago and I lost them all)

 Once we had built the robot it was time to program it to do our bidding. We used
LabVIEW to program the robot. We wrote an algorithm to move into the center of the room, begin rotating to the left, if the IR
signal got weaker rotate the opposite way until the signal starts getting weaker. Then the right wheel would move forward until
the signal got weaker, then it would alternate to the left wheel until the sensor got to a thresh hold that indicated the claw
was in pickup range of the sphere. The robot would then grab the sphere and place it in the storage unit. This process would
repeat until the IR sensor did not register an IR light below a thresh hold and would then exit the room.
Once we had built the robot it was time to program it to do our bidding. We used
LabVIEW to program the robot. We wrote an algorithm to move into the center of the room, begin rotating to the left, if the IR
signal got weaker rotate the opposite way until the signal starts getting weaker. Then the right wheel would move forward until
the signal got weaker, then it would alternate to the left wheel until the sensor got to a thresh hold that indicated the claw
was in pickup range of the sphere. The robot would then grab the sphere and place it in the storage unit. This process would
repeat until the IR sensor did not register an IR light below a thresh hold and would then exit the room.
Uh oh, this section about this person's work experience is a stub. As an employer, you can help by expanding it.
During the summer of my freshman year at college I got a job as a research assistant at the University of Houston-Victoria.
During this job, I worked on editing a couple of research paper about background subtraction algorithms written by a previous
researcher.
Heres the link to the first
Heres the link to the second
While working there I got a lot of experience using LaTex to write the paper as well as some experience coding in C++ using the
OpenCV libraries and using C++ to collect and manipulate data. I also got some experience messing around with the Unreal engine
for another project, the University was working on.
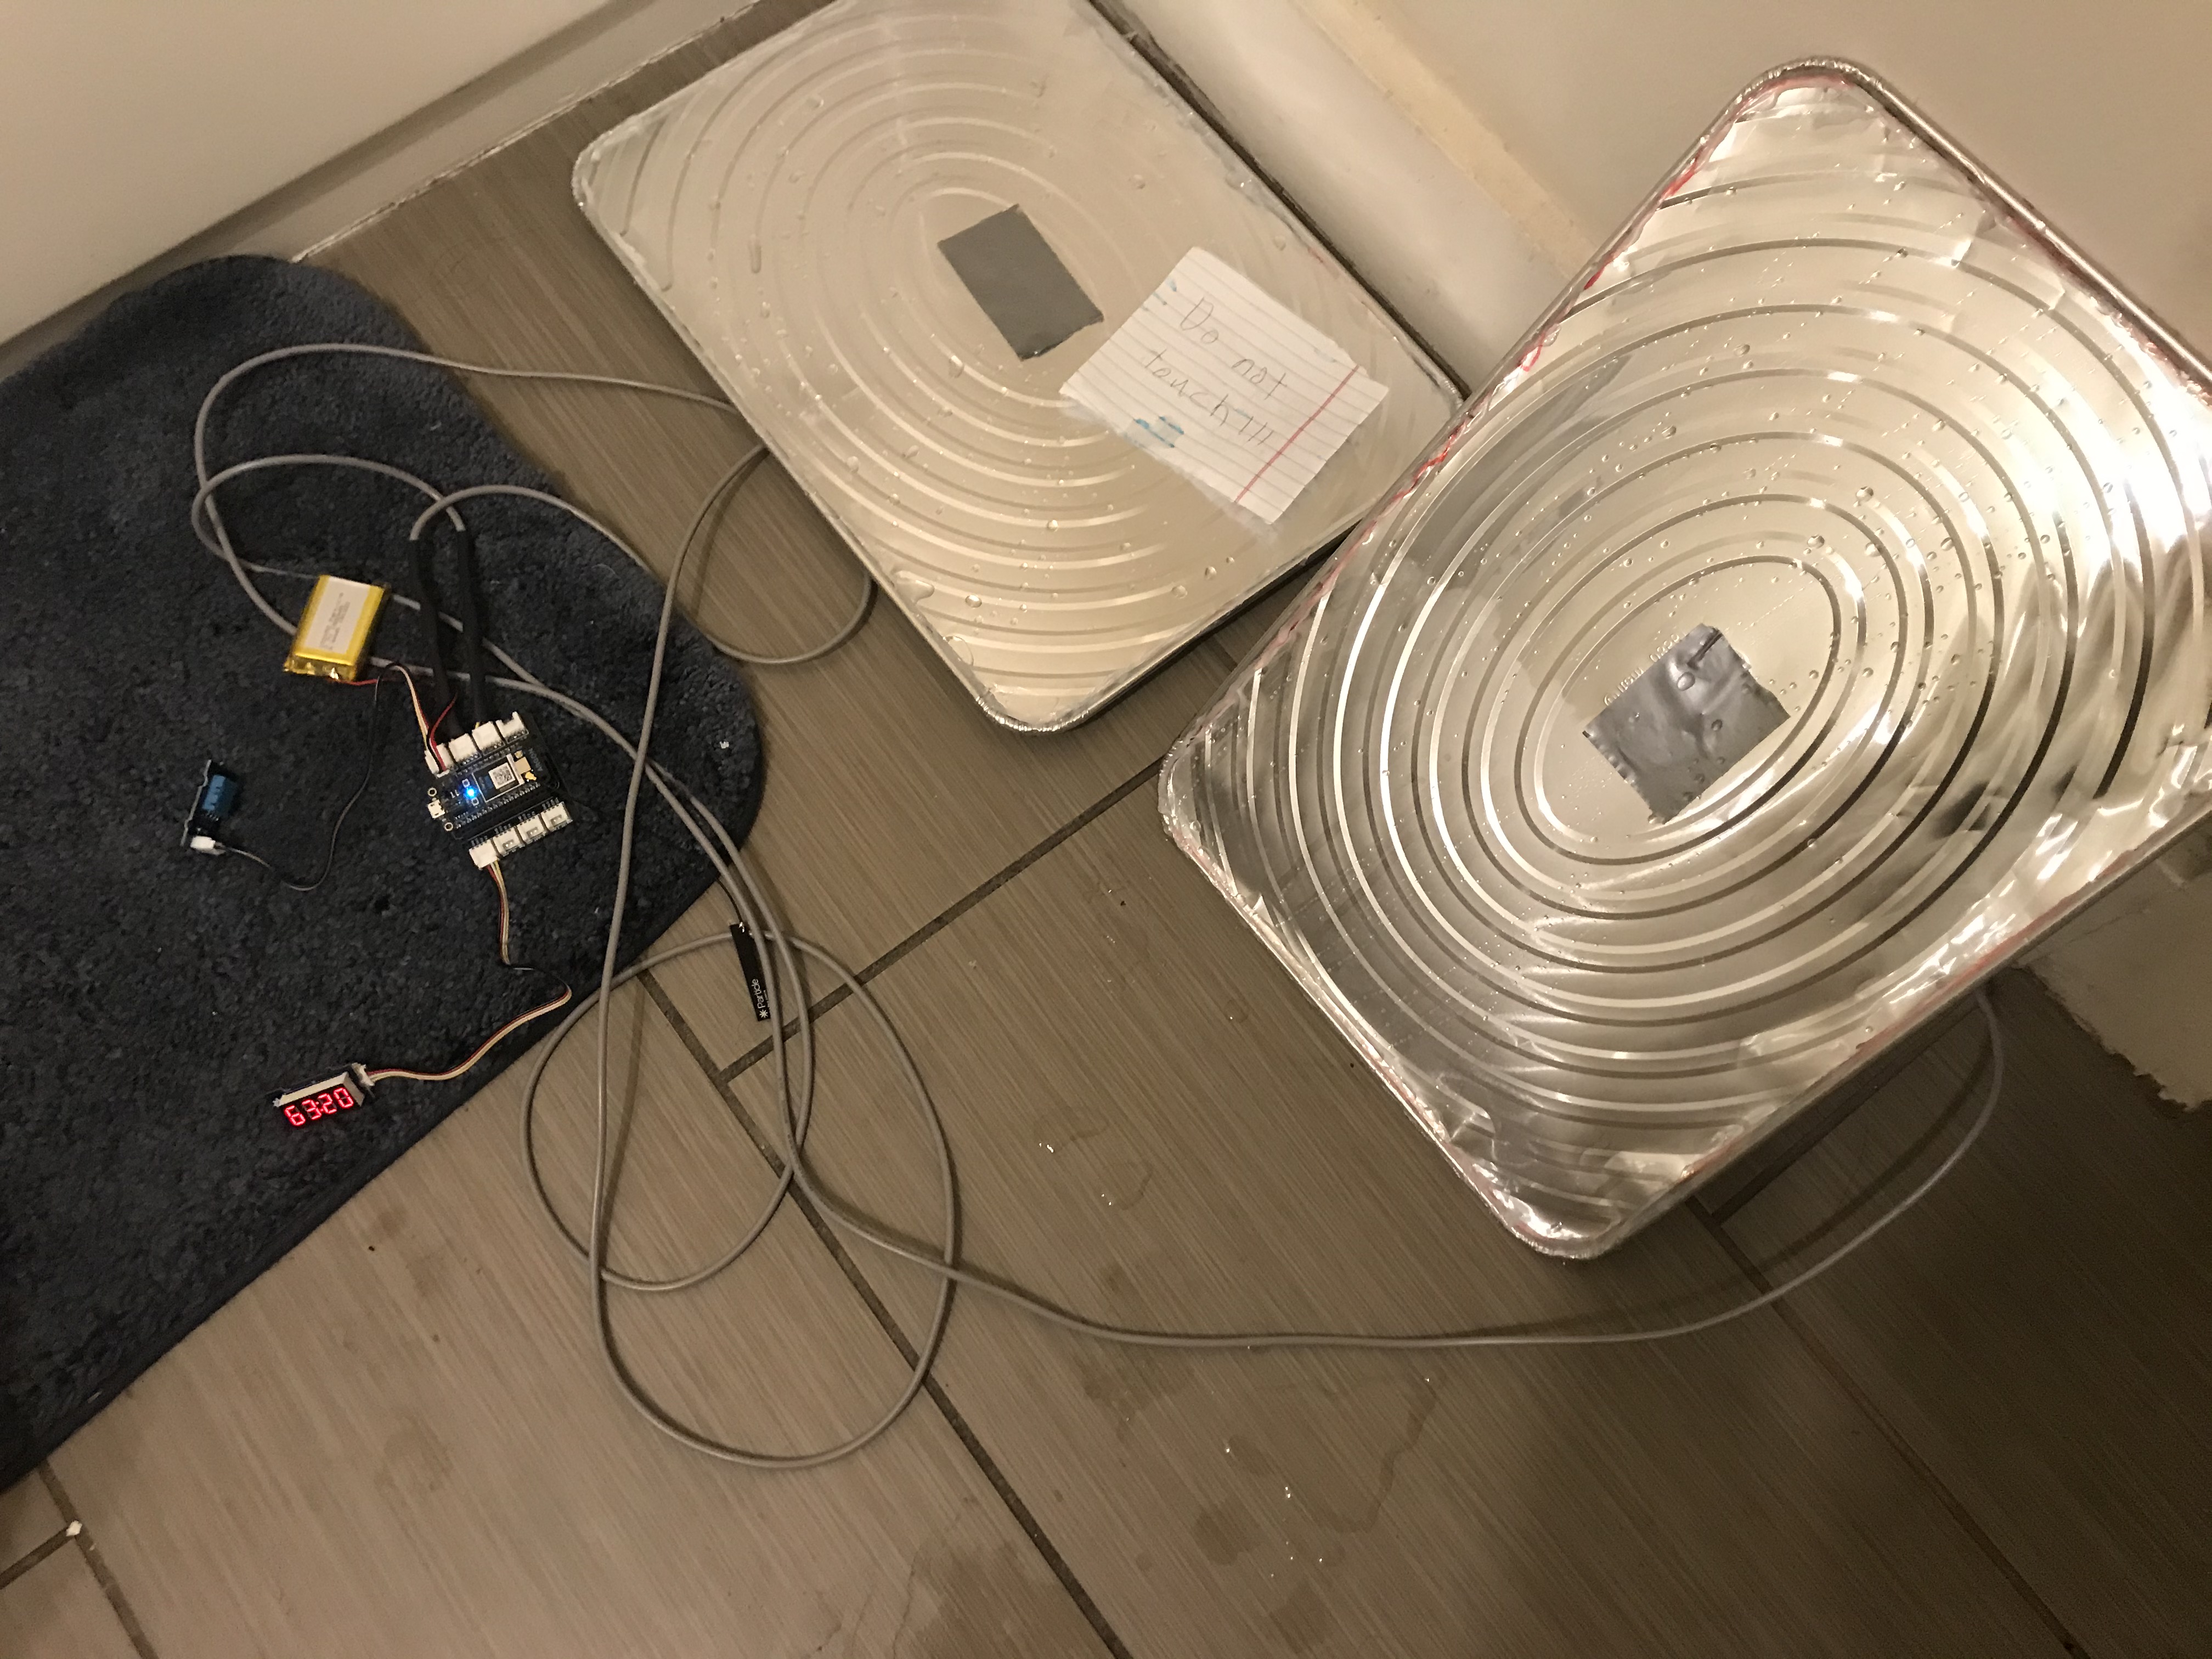
During the winter break of my senior year in college, I got a job working on an experiment to determine the most efficient tank
to get water to ambient temperature as fast as possible for a small volume of water. (Unfortunately, I cannot disclose the
purpose as I am under NDA) I started by doing some preliminary research on heat transfer in relation to the surface area. After
doing some calculations I decided to start working on an experimental setup. I wanted to test the effect of surface to volume
ratio of containers to see if it lightened up with the theoretical values found previously as well as test the efficiency of
convection vs conduction for the vessels. In order to tests the attributes I took a particle argon board (similar to an Arduino)
with temperature sensor attachments and programmed it to record the ambient temperature and humidity as well as the temperature
of two different containers and publish the data to the particle cloud.
I then found a web API to take the published data and upload it to a google sheet so I could perform data analysis. After final
analysis, I found that the heat transfer through conduction was faster near the beginning of the transfer but slowed down as the
container got closer to ambient compared to the convection heat transfer. In regards to the surface to volume ratio experiment
vs theoretical values, the temperature vs time curves was pretty close to the theoretical ones I generated using Newton's law of
cooling. The experimental values showed a faster increase in temperature at the beginning but a slower climb to ambient than the
theoretical values.
Here's a link to the data if your interested
My current job working at the Texas Advanced Computing Center has involved me working on a python script to take a bunch of kubeternete yaml files and templizting them to allow for easy redeployment with changes to the site url, site id, tenant list, and many other things.